Overview
In order to keep your Safety Pool™ data secure, it is important that the users you give access to are only allowed to access the data that they need to in order to perform their job. Safety Pool™ provides you with the ability to do this through Roles.
A Role is a set of permissions which defines what data can be accessed and what operations are allowed on that data. Every user is assigned a Role and it is the Role which determines what they can and can’t do in the database.
The following instructions guide you through creating a new Role and assigning it to users.
How to add a role
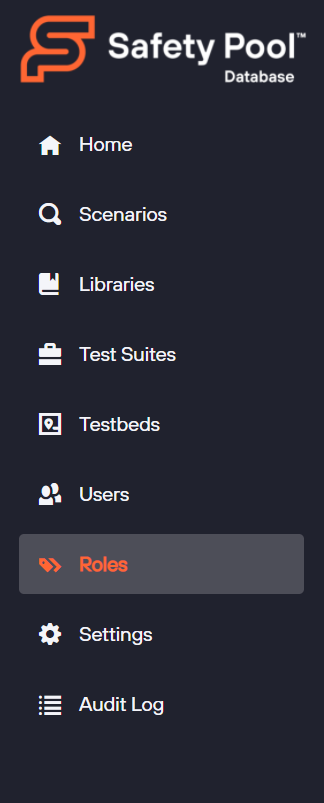
 Click on ‘Roles’ in the left menu panel, as shown opposite.
If you do not have this option then you do not have permission to access Roles, in which case please contact the Administrator for your organisation who can either grant you permission to do this, or create the Role for you.
The Administrator for your organisation has access to Roles by default.
Then click the ‘New Role’ button on the top right. If you do not have this option then you do not have permission to add Roles, in which case please contact your Administrator.
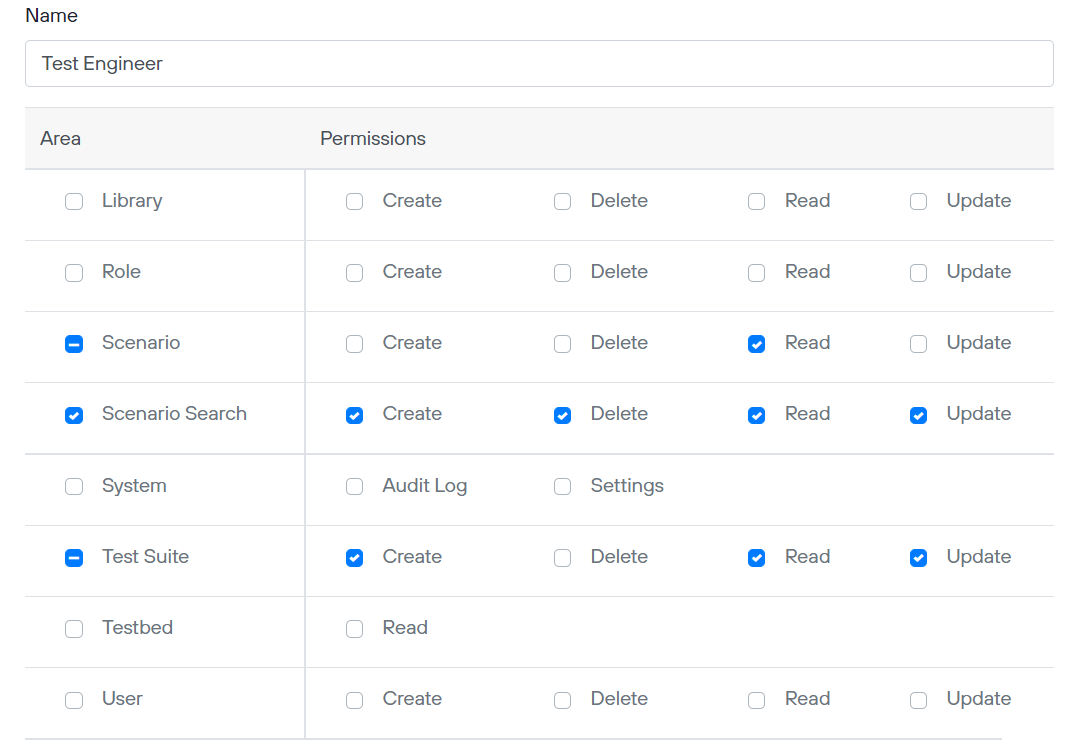
You will then be presented with the ‘New Role’ form where you can enter a name for the role and select the permissions that you want the role to have.
Permissions are grouped by Area, and within each Area there are granular permissions appropriate to that area of the system.
To illustrate how to create a new role, let’s take an example of creating a new role for a Test Engineer. In this example, the Test Engineer needs to be able to search the database for scenarios, view them, and then add them to a Test Suite. So in the figure below, we have ticked permission to be able to ‘Read’ scenarios but not make any changes to them. We have given full permissions to Scenario Search so that they can create new searches and modify existing ones, and we have given them the ability to create, read, and update Test Suites.
 Editing a Role
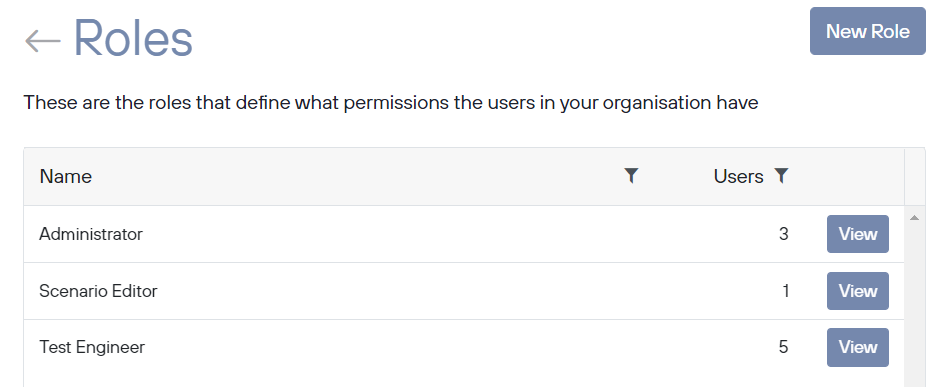
After having selected the desired permissions, we click ‘Save’, and are then returned back to the Roles list where we can see the new role which we have just created. If we want to check the permissions for the role, we can click ‘View’ and will then be able to see a summary of the permissions.
 Roles listHaving created a new Role, it is then available to assign when creating new users and can also be assigned to existing users by editing their User record.